Pages

Pie Crust Cookie Search

Friday, December 29, 2023

Chimichurri

We have written elsewhere about my dad's preparation of taco dip on Christmas Eve every year when I was growing up. Last year my family varied from the specific tradition but kept to its spirit by having Michael prepare dinner on Christmas Eve, and we had ribs and chicken wings. He did the lion's share of the Christmas shopping this time, though, so maybe he would preferred a break! 

This year, he decided on steak, which we were lucky to grab at a Costco that was as crowded as I have ever seen it. The line went from the front of the store all the way to the milk before snaking back on itself all the way to the rotisserie chicken. For Michael's birthday we make steak at home, and in recent years this has included chimichurri, a South American condiment. We have cobbled together various chimichurris, but this year I kept notes and we now have a standard.


Print

Chimichurri

2 garlic cloves, peeled and trimmed
2 T red wine vinegar
1/2 c olive oil
roughly 1 c cilantro, cut from the end of a bunch
roughly 1/2 c parsley, cut from the end of a bunch
3/4 teas dried oregano
1 teas kosher salt
pepper to taste

Process all ingredients in a food processor until smooth, about 30 seconds. 

Thursday, July 27, 2023

Kókópancakes


print

Kókópancakes


Adapted from: Alton Brown
Yields: about 10 (I usually double since these are easy to freeze and use later)

2 eggs
3/4 c milk
1/2 c water
1 c flour. all-purpose or a mix including some whole wheat
3 T butter, melted
1-2 T sugar, if you want sweet crepes
1 teas vanilla, ditto

Place the eggs, milk and water into a blender and mix until well combined. The add the flour, butter and extra ingredients, if you are using them. Run blender until all is well mixed and smooth.. You may need to use a scraper to push flour off the sides of the blender. AB recommends letting this sit in the fridge for 60 minutes for greater ease of cooking (less tearing), but Kókó and her daddy often don't wait to cook.

Heat a crepe pan or a small nonstick skillet (or best of all, a ponnukokupanna, an Icelandic pancake pan), over medium heat for at least 5 minutes. Butter the pan and use a teaspoon full of batter to test whether the pan is hot enough. It should take 30-60 seconds to cook on one side and fewer than that to cook the second side. Use a quarter cup measure to pour the batter in the pan, pick it up and turn and swirl so the batter slides into a thin covering of the bottom of the pan. When the edges dry slide a thin spatula under and flip the pancake carefully so the other side can cook. AB says he always plans on the first pancake being for the dog so don't get discouraged if your first few are not "beautiful". They will taste good. You can butter your pan between pancakes but I don't always do so. In addition, I prefer vegetable oil to butter. I think butter tastes better, of course, but for me oil is easier to work with. 

These can be treated as crepes but also as pancakes and you can use any topping including macerated fruit or berries. My favorite involves lemon juice and vanilla sugar. Other family members are fans of Nutella, powdered sugar, or cinnamon sugar, often all mixed together!

Forager's Pasta

This recipe comes from a lovely book titled, I Dream of Dinner (so You Don't Have To) by Ali Slagle. Her recipes are in a narrative form and allow for tweaks and substitutions and are flexible in amounts, so I'll set this up the way I made it. I'm glad to have run into this recipe since I'm fond of savory dishes which include sweet spices. 


print

Forager's Pasta


Source: I Dream of Dinner (so You Don't Have To)
Serves: 4-7

1 pound mushrooms of any variety or several varieties, cut or torn into bite size pieces
1 can chickpeas, drained and rinsed
salt and pepper to taste, remembering you'll use some of your pasta water which will add to total salt
2 strips of lemon zest and 3 T lemon juice
8 T butter, cut into 8 pieces and kept in fridge until needed
cook's choice of herbs and spices, such as 1 teas black peppercorns or fennel seeds, 1 half cinnamon stick, broken, or some fresh grated nutmeg, at least 8 sage leaves, 4 bay leaves, 3 thyme sprigs, and or 2 rosemary sprigs
3 T olive oil
12 oz short pasta but not necessarily tiny pasta

Heat the olive oil in a large skillet or a Dutch oven and cook the mushrooms and chickpeas. Season with salt and pepper. Shake the pan occasionally and cook until contents are browned, 10-15 minutes. Meanwhile, start a pot of water to boil. If you cook the pasta in a smaller amount of water, you'll have starchier water which will be good for your final product. But you'll have to stir the pasta while it cooks so it doesn't clump.

Coarsely grind or smash the spices you want to use and strip the herb leaves off their stems. If desired, you can chop the sage and/or rosemary. 

When the water boils, add the pasta and cook until almost al dente. Reserve at least 1 cup of the cooking water and drain.

When the chickpeas and mushrooms have finished, add the butter around the edges of the pan. Stir in the herbs and spices and cook while the butter foams and turns golden. Add the pasta to this mixture and cook, stirring while dribbling in some of the pasta water until the butter and the water form an emulsion. Taste and season if you need more salt and pepper. Pull out any sticks or stems left from the herbs and serve. 

Note: I used fennel seed, cinnamon stick, sage and bay leaves. For serving, I garnished with chopped parsley. In the summer I may garnish with basil. 

Sunday, June 4, 2023

Greek Salad

This briny salad hit the spot this week, with the start of summer. I use the recipe as a framework, adapting as needed to what I have on hand. I've used dried oregano, fresh red peppers instead of jarred, yellow onion instead of red, and whatever tomatoes are convenient. It's especially nice in the summer with my back porch oregano and mint and garden tomatoes.


Print

Greek Salad

Serves 6-8
Source: Cook's Illustrated https://www.americastestkitchen.com/cooksillustrated/recipes/383-greek-salad

Vinaigrette

3 T red wine vinegar 
1 1/2 teas lemon juice
2 teas minced fresh oregano leaves
1/2 teas salt
1/8 teas black pepper
1 garlic clove, minced
6 T olive oil

Salad

1/2 red onion, sliced thinly
1 medium cucumber, peeled, halved lengthwise
2 hearts romaine lettuce, washed, dried, and torn in to bitesize pieces
2 large tomatoes, cored, seeded, and cut into wedges
1/4 c loosely packed, torn fresh parsley leaves
1/4 c loosely packed, torn fresh mint leaves
1 c (about 6 oz) jarred, roasted red bell pepper, cut into strips no longer than 2 inches
20 large kalamata olives, pitted and quartered lengthwise
1 c feta cheese, crumbled

Whisk the vinaigrette ingredients together in a large bowl. Add the onion and cucumber, toss, and marinate for 20 minutes. Add lettuce, tomatoes, parsley, mint, and bell pepper to the bowl and toss. Sprinkle with olives and cheese, then enjoy.


Thursday, May 25, 2023

Strawberry Shortbread and Cream

We're both experiencing a glut of strawberries, Mom from her garden and me from my favorite local grocery store that has had cases on sale. Here's a favorite way to enjoy them.  


Print

Strawberry Shortbread and Cream


Yield: 4 servings plus extra shortbread (about 50 cookies, if you follow size directions)


For the shortbread:

1 c unsalted butter, preferably cultured (European-style), at room temperature
3/4 c granulated sugar
1 egg yolk
1/2 teas fine sea salt
1 T vanilla extract or 1 vanilla bean, split and seeded with a tip of a knife 
1/2 teas orange blossom water or grated orange zest (optional)
2 c AP flour

For serving:

1 pint strawberries, sliced
granulated sugar, to taste, remembering the cookies are on the sweet side
1 c heavy cream
1/2 teas vanilla

Attach a paddle attachment to either a stand mixer or a hand mixer. Cream the butter and sugar until fluffy and light, about 2 minutes. Add the egg yolk, salt, vanilla (extract or seeds), and orange blossom water, if using and beat. Add the flour and stir until smooth, occasionally using a rubber spatula to scrape down the sides of the bowl.

Place a 12-inch long piece of  plastic wrap on a counter and place the dough in the center. Using the wrap to form a barrier between you and the sticky dough, form it into a log about 1 1/2 inches in diameter. You can also form 2 logs if you find that easier. Wrap tightly and place in the fridge until it's completely cold, at least 3 hours and up to 5 days.

Preheat oven to 350F when you are ready to bake and place parchment paper or baking liners on 2 baking sheets.

Remove the plastic wrap from the dough log and slice it into quarter-inch rounds. Place the dough on the prepared sheets and place in the oven. Bake 10-15 minutes until they are golden at the edges. These spread a little so keep that in mind. I successfully placed 4 across with 1 1/2-inch cookies. 

Transfer the baking sheets to a cooling rack and allow them to cool thoroughly before removing. These can be baked up to 4 days ahead as long as you store them in an airtight container at room temperature. 

About 20 minutes before serving, sprinkle the sliced berries with a little sugar and stir. Allow them to sit for at least 15 minutes while they release their juice.

Whip the cream using a mixer with a whisk or a whisk and a bowl (more effort on your part). Add a teaspoon or so of sugar. Again, the cookies are so sweet you may not need sugar in the cream.

Divide the strawberries into serving bowls saving a little juice for drizzling. Top with the whipped cream and drizzle the cream with some of the juice.  Tuck several cookies into each bowl and eat with spoons. 

Wednesday, May 3, 2023

Shrimp and Grits

When I leave my landlocked state and spend time oceanside, this is one of my favorite things to order at a restaurant. Thankfully, freezers make it possible to enjoy this dish other places and other times. 


print

Shrimp and Grits


Source:  The 150 Best American Recipes by Fran McCullough and Molly Stevens
Serves: 4

Grits:

4 c water
1 c grits (preferably stone ground)
1/2 teas salt
2 T butter
1 c grated sharp cheddar cheese (4 oz)
1/2 c freshly grated Parmesan cheese
freshly ground white pepper, cayenne pepper, and nutmeg, all to taste

Shrimp:

6 slices bacon, cut into small pieces
oil for frying
1 pound shrimp, peeled, deveined if desired, rinsed and patted dry
2 c wiped and cleaned mushrooms, sliced
1 cup sliced scallions
1 large garlic clove, minced
4 teas fresh lemon juice
Hot pepper sauce to taste
salt and freshly ground black pepper
1/2 c chopped fresh parsley

I found it easiest to prep the ingredients for both portions of the meal before starting to cook either. 

To make the grits:

In a large heavy saucepan, bring the water to boil and gradually stir in the grits. Reduce the heat to it's lowest point and cook for about 20 minutes, stirring frequently.  When grits are thick and tender, stir in the salt, butter, and cheeses. Add about a pinch of each of the spices and taste to see if you would like to add more.

To make the shrimp:

This can be started as the grits finish up. You may want to keep the grits in a warm oven if they finish first, as mine usually do.

Cook the bacon in a 12-inch skillet and remove bits from the pan when they are finished. You may pour off all but a couple tablespoons of bacon fat.

If you wish, you can add some neutral cooking oil to the bacon fat in the skillet, so you have a thin layer of cooking fat. Bring the fat in the skillet to a medium-high heat. Add the mushrooms and cook for 5 minutes or so. Stir in the shrimp and cook until the shrimp start to color. Quickly turn them over and add the scallions, bacon, and garlic. Stir in the lemon juice and some hot pepper sauce, if you wish. Top with a sprinkling of parsley or save it for garnishing each serving.

Place the grits on warm plates and top with the shrimp mixture and serve immediately.

Tuesday, March 14, 2023

Pumpkin Spice Waffles

Here's another baked item (but in a waffle iron) made with a vegetable and some whole grain flour. These make your kitchen smell delicious. 


print

Pumpkin Spice Waffles


Yield: five to seven 7-inch Belgian waffles


ATK prefers store-bought oat flour with a very fine grind. They suggest if you don't have access to the flour, grind some old-fashioned oatmeal in a food processor into as fine a meal as you can get, about 2 minutes. They warn that it will be different, more dense. They also warn against using toasted oat flour in the recipe.

I made no adjustments for altitude.

2 1/2 c oat flour
1/2 c AP flour
1 teas ground cinnamon
1 teas baking powder
1/2 teas baking soda
3/4 teas salt
1/4 teas ground nutmeg
1/4 teas ground cardamom
1 (15-oz) can unsweetened pumpkin puree
1 1/4 c plain low-fat yogurt or Greek yogurt if that is all you have
2 large eggs
1/4 c oil (ATK recommends expeller-pressed canola oil)
1/4 c sugar
1 teas grated fresh ginger (if you like ginger, use more)

Heat your oven to 200F for keeping waffles warm after baking. start heating your waffle iron.

Place both flours, cinnamon, baking powder and soda, salt, nutmeg and cardamom in a large bowl and whisk together.

Measure yogurt in a large liquid measuring cup and add pumpkin, eggs, oil, sugar, and ginger and stir until combined. Pour into the flour mixture and whisk until smooth and well combined. If you use Greek yogurt, you'll need to add some milk or water until the texture is like cake batter or a thick pancake batter. 

When ready to bake, brush the iron with oil. Add a scant cup of batter and close the lid, cooking according to manufacturer's directions. Cook until waffles are deep golden brown and crisp. Serve immediately or keep warm in the oven on a cooling rack. 

Notes:

The original recipe found here instructs cooks to reduce the liquid in canned pumpkin by draining on paper towels. This worked well; in fact, too well. I had to add liquid and it was guess work, basing my guesses on what I thought waffle batter ought to look like. I added extra milk several times. The second time I made the waffles, I didn't drain the canned pumpkin and still had to add more liquid to attain the correct texture. 

You can substitute whole wheat flour for some of the oat flour, if needed. 

Add-ins are nice. I've used chopped fresh cranberries, blueberries, nuts, pepitas, and/or chocolate chips. I had to oil the griddle more often with some of the add-ins. 


Saturday, February 25, 2023

Tomato Rice Soup with Caramelized Onions

I have a quite a collection of tomato soup recipes, considering how I detested it as a child. Of course, I was served only canned soup, so I don't blame my younger self. Here's the latest addition. The caramelized onions add texture and sweetness, while the rice makes it heartier than some.  


print

Tomato Rice Soup with Caramelized Onions


Source: Milk Street
Serves 4-6

1 T olive oil
1 large yellow onion, halved and sliced thinly
1 teas white sugar
kosher salt and ground black pepper
1 teas dried thyme
1/2 c long-grain white rice, rinsed and drained (see note below if you prefer brown rice)
1 14-1/2 oz can whole peeled tomatoes, crushed by hand
1 quart chicken broth or vegetable broth
1/2 c parsley or basil leaves, chopped
optional basil pesto or grated Parmesan cheese, or both

Over medium flame, heat oil in a large saucepan or medium Dutch oven until it shimmers. Stir in the onion, sugar and half a teaspoon salt and pepper. Cook until the onion is well browned and quite soft, stirring occasionally. Place half of the cooked onion in a small bowl and set aside.

Add the thyme to the onion in the pan and cook for an additional 30 seconds. Stir in the rice, tomatoes and juices and broth. Turn heat to medium high and bring the soup to a simmer. Reduce the heat to medium and continue cooking, covered, until the rice is tender around 20 minutes. Stir from time to time. 

When the rice is cooked, take the soup off the heat and stir in the parsley. Taste it to check for seasoning and add more salt and pepper if necessary. Top each serving with some of the onion and drizzle with oil. Or add either of the optional garnishes.

Notes:

The magazine indicates you can use short grained rice if that's what you have although authors preferred long grain white. I made mine with brown rice and it needed twice the amount of cooking time. 

I think I'll caramelize 2 onions next time, particularly if I let them get quite brown. One isn't enough for all the servings of the soup and leftovers are easy to use.


Saturday, February 18, 2023

Skillet Pumpkin Cornbread

Here's a good way to sneak in a bit of extra vegetables. Although the bread actually looks more orange than this photo, don't be surprised that the pumpkin doesn't make a marked change in flavor. I find this quite tasty but it doesn't have the same height as my usual cornbread. One benefit of the added pumpkin is that it keeps the bread moist for several days after baking.


print

Skillet Pumpkin Cornbread


Yields one 9" cornbread

1 c pumpkin canned pumpkin puree
1 c low-fat milk
2 T olive oil
1 T mild honey
2 eggs
1 1/2 c ground yellow cornmeal, ideally stone ground, but not necessarily
1/2 c AP flour
1 T baking powder
1/2 teas baking soda
3/4 teas salt
1 T unsalted butter


Preheat oven to 400F. Place inside a 9" cast iron skillet or a 2-qt baking pan or a 9" round cake pan.

Place the pumpkin puree, milk, olive oil, honey and eggs in a bowl or large liquid measuring cup and whisk until combined. 

Combine the cornmeal, flour, baking powder and soda and salt in a large bowl. Stir the wet ingredients into the dry and mix but don't overmix.

Remove the pan from the oven and drop the butter in. When it has melted, brush the sides with the melted butter and pour the excess into the batter. Mix it in quickly and scrape the batter into the hot pan. Return to the oven and bake for 30-40 minutes until a cake tester comes out clean. 

The original recipe instructs bakers to let the bread cool for 20 minutes. I've not been able to wait that long.


Portuguese-style Sweet Potato Buns

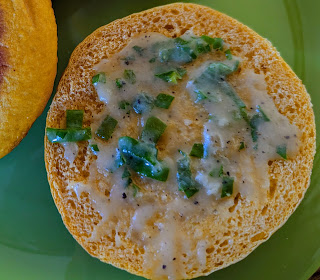
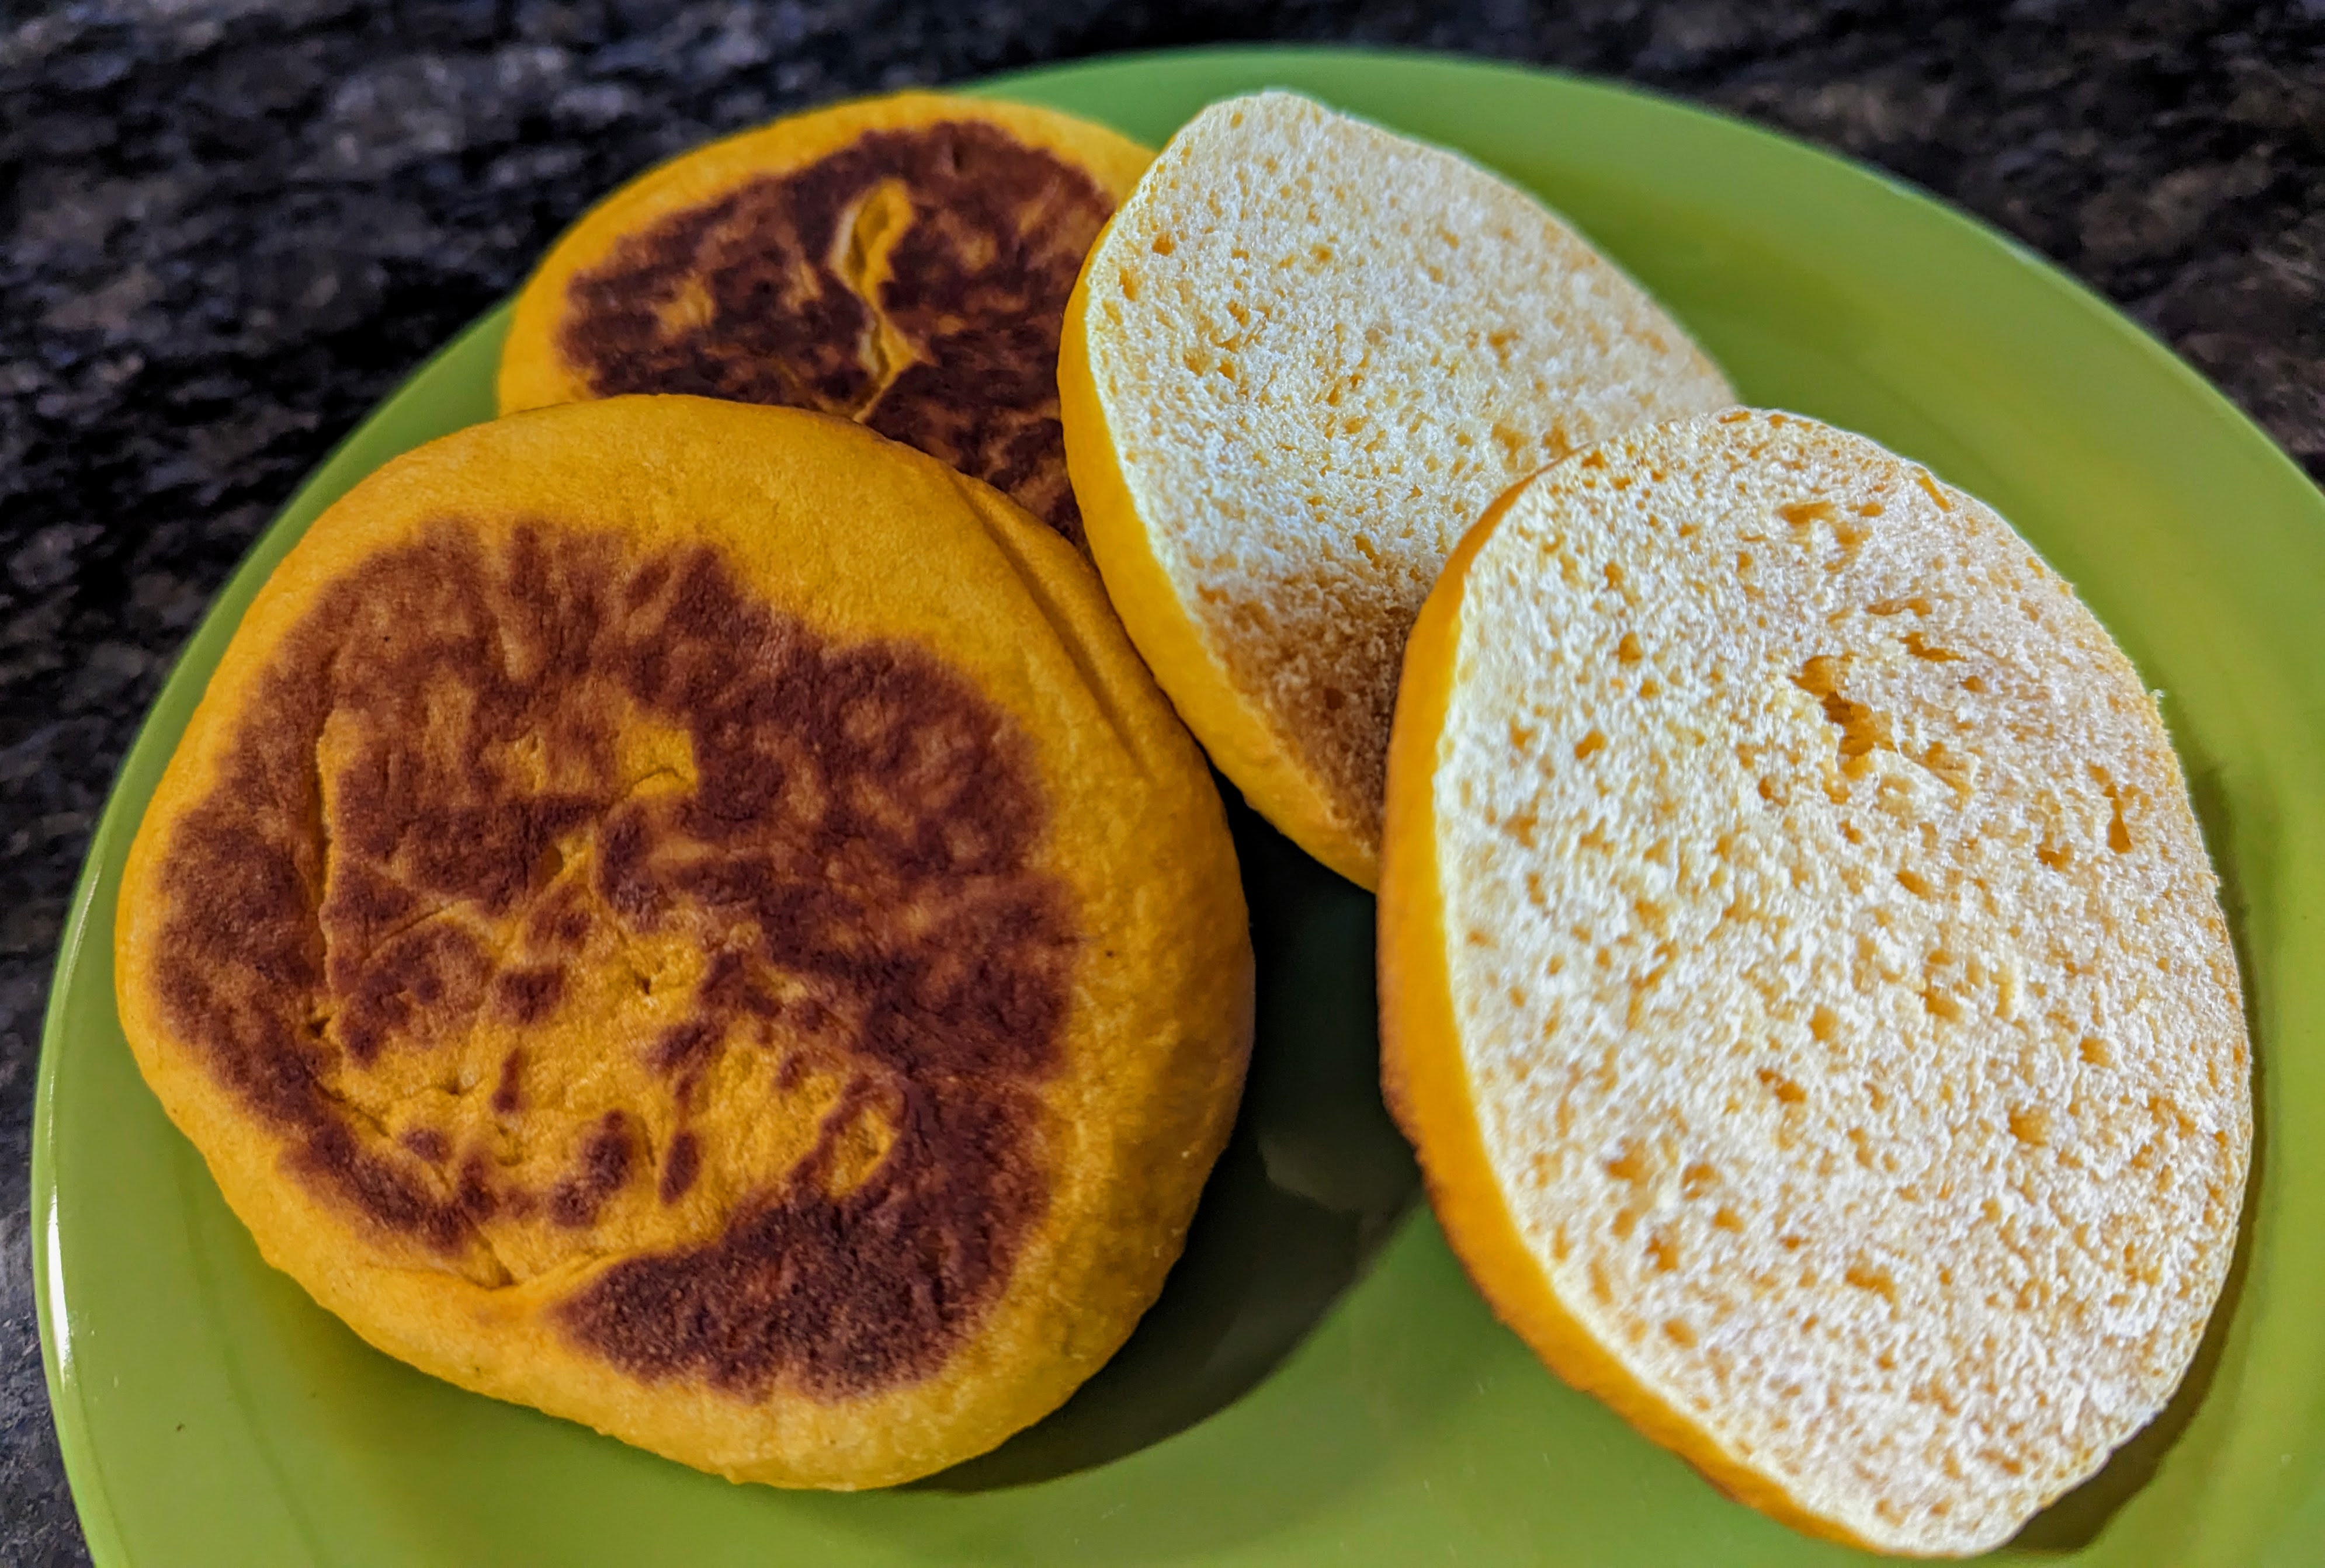
I don't quite know what to call these because they look a little like English muffins (but their inner texture is quite different); they feel like they would make a sturdy burger bun (but the color is unconventional); and they aren't really a dinner roll. Nomenclature aside, these colorful breads were the favorite part of one family meal over the Christmas holiday, especially with the chive butter spread, which I'll include.


print

Portuguese-style Sweet Potato Buns


Yield: 8 

If you've got a scale, using it will result in greater accuracy. 


12 ounces orange sweet potatoes, peeled and cut into 1 inch chunks
2/3 water
3 T salted butter, cut into 3 pieces
1 T honey
1 1/2 teas kosher salt
3 c bread flour (411 grams)
2 teas instant yeast


Cook the sweet potatoes, water, butter, honey, and salt in a small saucepan until the sweet potatoes do not resist when poked with a skewer. Pour all into the bowl of a stand mixer and allow to sit for at least 30 minutes to cool so the heat doesn't kill the yeast. When cool, use a paddle attachment to mix the potatoes until they are smooth. Or you can use a potato masher. 

Prepare a sheet pan by covering the surface with kitchen parchment.

Stir in the flour and yeast and replace the paddle with the dough hook. Run the mixer on low until the flour is mixed in. A dough should form in about 5 minutes. Increase the speed to medium high and run the mixer for another minute, for a total of 6-7 minutes.

Move the dough into a greased bowl with a cover to allow to rise until double (about an hour). I'm lazy about doing dishes and re-use my stand mixer bowl, after maneuvering the dough around in the bowl so I can mist the bottom of the bowl with vegetable oil spray.

When the dough has doubled, plop it out onto a very lightly floured counter and divide into 8 pieces of equal size. Tuck sides of each piece into the center and pinch, forming a small ball. Place one ball onto the counter where there is no flour and cupping your hand roll the ball until it is smooth. Place each ball onto the parchment, pinched side down, and press into a 4-inch disk, about a quarter inch thick. Cover and allow to rise for 30 minutes. 

At about the 15 minute point, start to preheat your oven to 350F (or sooner if your oven is slow to preheat). The oven rack should be in the middle. At about the 20-25 minute point, start to preheat a cast iron skillet, griddle, or a large non-stick skillet. It's ideal (but not imperative) to be able to cook 4 of these buns on the surface at the same time.  After the 30 minutes has passed, when your griddle is hot enough to sizzle drops of water, carefully place 4 buns on the surface, top-side down, and cook for 1-2 minutes until they are golden brown. Flip them over, using a wide spatula and cook for another 1-2 minutes until second side is browned. Place these par-cooked buns onto the sheet pan and repeat with the remaining four dough rounds. 

After all eight buns have been par-cooked, place the sheet pan into the preheated oven and bake until the rolls have reached an internal temperature of 200F or 12-14 minutes. Milk Street instructions indicate you should cook for the full 14 minutes if you don't have a thermometer. 

These can be served completely cooled and sliced in half, or somewhat warm from the oven. They are good sliced and toasted as well, especially after a day or two. They store well in the freezer, too. 

Note: The last time I made these, I didn't weigh the flour and I had to add 1/4 c extra water to get my dough to be the right texture. As the teachers of my Turkish cooking class taught me, roll doughs are best when they feel like your ear lobe when you pinch it. 

Garlic Chive Butter


Also from Milk Street. I think this is plenty for 8 buns so I half it. I've also melted the butter when I've been in a hurry, however, this does cause the liquid to separate from the solids, somewhat.


1 stick of butter
3 T finely chopped fresh chives (in a pinch I've used scallions as well as finely chopped light-green leek leaves)
1 small garlic clove, finely minced
1/4 teas freshly ground black pepper

Use a rubber spatula to stir the butter until it is no longer a stick but a creamy mass of smooth butter. Add the chives, garlic, and pepper and stir to combine.


Wednesday, January 11, 2023

Orange Cranberry Scones

 This flavor combination would fit well during the holidays, but because the cranberries are dried, you can enjoy these scones any time. 


Print

Orange Cranberry Scones

Slightly adapted from https://cooking.nytimes.com/recipes/1023483-cranberry-orange-scones
Yields 9 scones


1 medium orange
1/4 c granulated sugar
2 1/4 c flour
1 T baking powder
1/2 teas fine salt
1/2 c unsalted butter, cold
1 c dried cranberries, roughly chopped
1/2 c buttermilk, cold
1/2 c cream, cold

for the glaze: 
1 c powdered sugar
4-6 teas orange juice (fresh from the zested orange is nice)
pinch salt

Preheat oven to 400 degrees.

Zest the orange. In a large bowl, use your fingers to mix the zest and the 1/4 c sugar together. Add the remainder of the dry ingredients and combine with a whisk. 

Grate the cold butter using a box cheese grater, then stir into the flour. Stir in the cranberries. Make a well in the center, and pour in the buttermilk and cream. Gently stir with a fork until the mixture creates a shaggy dough. 

Place the dough on a lightly floured surface, and pat into a 1-inch thick rectangle. Fold the dough in half, then pat it into another rectangle. Repeat the fold one more time, then pat the dough into a 7-inch square about 1-inch thick. Cut the dough into 9 pieces. 

Transfer the dough to a baking sheet lined with parchment paper, then brush the tops of the scones with some additional cream and sprinkle with a bit more granulated sugar. Bake until golden brown, 18-22 minutes. 

Make the glaze by mixing the powdered sugar with 4 teas orange juice and a pinch of salt. Add more juice until the glaze is a thick but pourable consistency. Let the scones cool for about 15 minutes before drizzling the glaze on.  


Tuesday, January 10, 2023

Sloppy Joes

"Mom, these are so much better than the sloppy joes at school."


Print

Simple Sloppy Joes

Adapted from https://cooking.nytimes.com/recipes/4203-sloppy-joes
Serves 12, with small appetites; my family of 6 with big appetites might have some leftovers

2 8-oz cans tomato sauce
1 c ketchup
3 T Worcestershire sauce
2 teas prepared yellow mustard
1 teas dry mustard
2 teas molasses
2 garlic cloves, minced
2 lbs ground beef
1 small onion, finely chopped
hamburger buns

Prepare the sauce: Combine the tomato sauce, ketchup, Worcestershire, mustards, molasses, and garlic in a saucepan. Add salt and pepper to taste and simmer over low heat while the meat is cooking. 

Heat a large skillet over medium high heat. Add the ground beef and cook until no longer pink. Place a paper towel or two inside a colander; then pour the meat into the colander, letting the fat drain. 

Cook the onion in the same skillet until the onion is translucent, stirring often, about 5 minutes. Add the sauce and the meat, then heat for a few minutes, stirring occasionally. Taste the sauce and adjust salt and pepper if needed. 

Toast the buns under a broiler, then fill and enjoy! 

The filling freezes well, for a make-ahead meal.